
How to Bypass an A12/A13 iPhone Passcode with UnlockTool and RP2350
A practical workflow for authorized technicians to back up passcode data, factory-reset and restore supported A12/A13 iPhones using UnlockTool and an RP2350 board.

Bypassing a passcode on a supported A12 or A13 iPhone with UnlockTool is a repair workflow that uses a ramdisk to back up required activation data, erase the device and restore the saved data. Some supported configurations also require an RP2350 board to prepare the device before UnlockTool can boot the ramdisk.
This guide presents the workflow as a structured checklist for experienced technicians. Button names, screen layouts and device support can change between UnlockTool releases. Compatibility also depends on the exact model, iOS build, security state and condition of the device. Verify current support before starting.
Authorization and data warning: Only work on a device you own or have explicit permission to service. This process includes a factory reset and may permanently erase data. It is not a guide to removing iCloud Activation Lock or bypassing proof of ownership.
What does an A12/A13 passcode bypass involve?
In phone repair, “passcode bypass” is commonly used to describe a workflow for an iPhone with a forgotten screen passcode where supported activation data can first be saved by a servicing tool. The usual workflow has three stages:
- Back up: boot a compatible ramdisk and save the passcode or activation data available to the tool.
- Factory-reset: erase the iPhone and remove the existing screen passcode.
- Restore: boot the ramdisk again and restore the backup created for that device.
This is not a universal procedure for every A12 or A13 iPhone. A successful outcome depends on the model, iOS version, security patch, hardware condition, Find My status and the functions supported by the current UnlockTool release.
Which iPhones use A12 and A13 chips?
The A12 Bionic platform is used in the iPhone XS, iPhone XS Max and iPhone XR. The A13 Bionic platform appears in the iPhone 11 series and the second-generation iPhone SE. Devices within the same product family can still run different iOS builds and have different security or ownership states.
| Platform | Common models | Verify before servicing |
|---|---|---|
| A12 Bionic | iPhone XS, XS Max and XR | Exact model, iOS build, Find My status and current tool support |
| A13 Bionic | iPhone 11, 11 Pro, 11 Pro Max and SE 2020 | Exact model, iOS build, Find My status and current tool support |
Do not rent an account based on the chipset name alone. Put the device into Recovery Mode, read its details and compare them with the current UnlockTool support information and release notes first.
What does the RP2350 board do?
RP2350 is a microcontroller used by several compact development boards. In this workflow, a board loaded with the appropriate supporting firmware may be required during the stage that prepares the iPhone for the subsequent ramdisk boot.
The RP2350 does not perform the entire procedure and does not replace UnlockTool. You still need compatible board firmware, a reliable cable, correctly installed drivers, accurate DFU timing and an UnlockTool version that supports the required function. Obtain firmware and connection instructions from a trusted technical source. Do not flash an unknown binary onto the board.
What to prepare before starting
- A Windows computer with a stable internet connection and enough free storage.
- The current UnlockTool application and an account with sufficient access time.
- Apple Mobile Device drivers or the required drivers installed with iTunes.
- A reliable Lightning data cable and a direct USB connection where possible.
- A compatible RP2350 board loaded with the correct supporting firmware.
- Ramdisk and IPSW files matching the device information reported by the tool.
- Stable power, sufficient phone battery and a dedicated folder for the backup.
- Proof of authorization and the owner's acceptance of the data-loss risk.
Download the required files, verify the drivers and test the USB cable before the rental period begins. Proper preparation prevents paid access time from being spent waiting for an IPSW download or diagnosing a basic connection problem.
A12/A13 iPhone passcode workflow with UnlockTool
Step 1: Enter Recovery Mode and read the iOS information
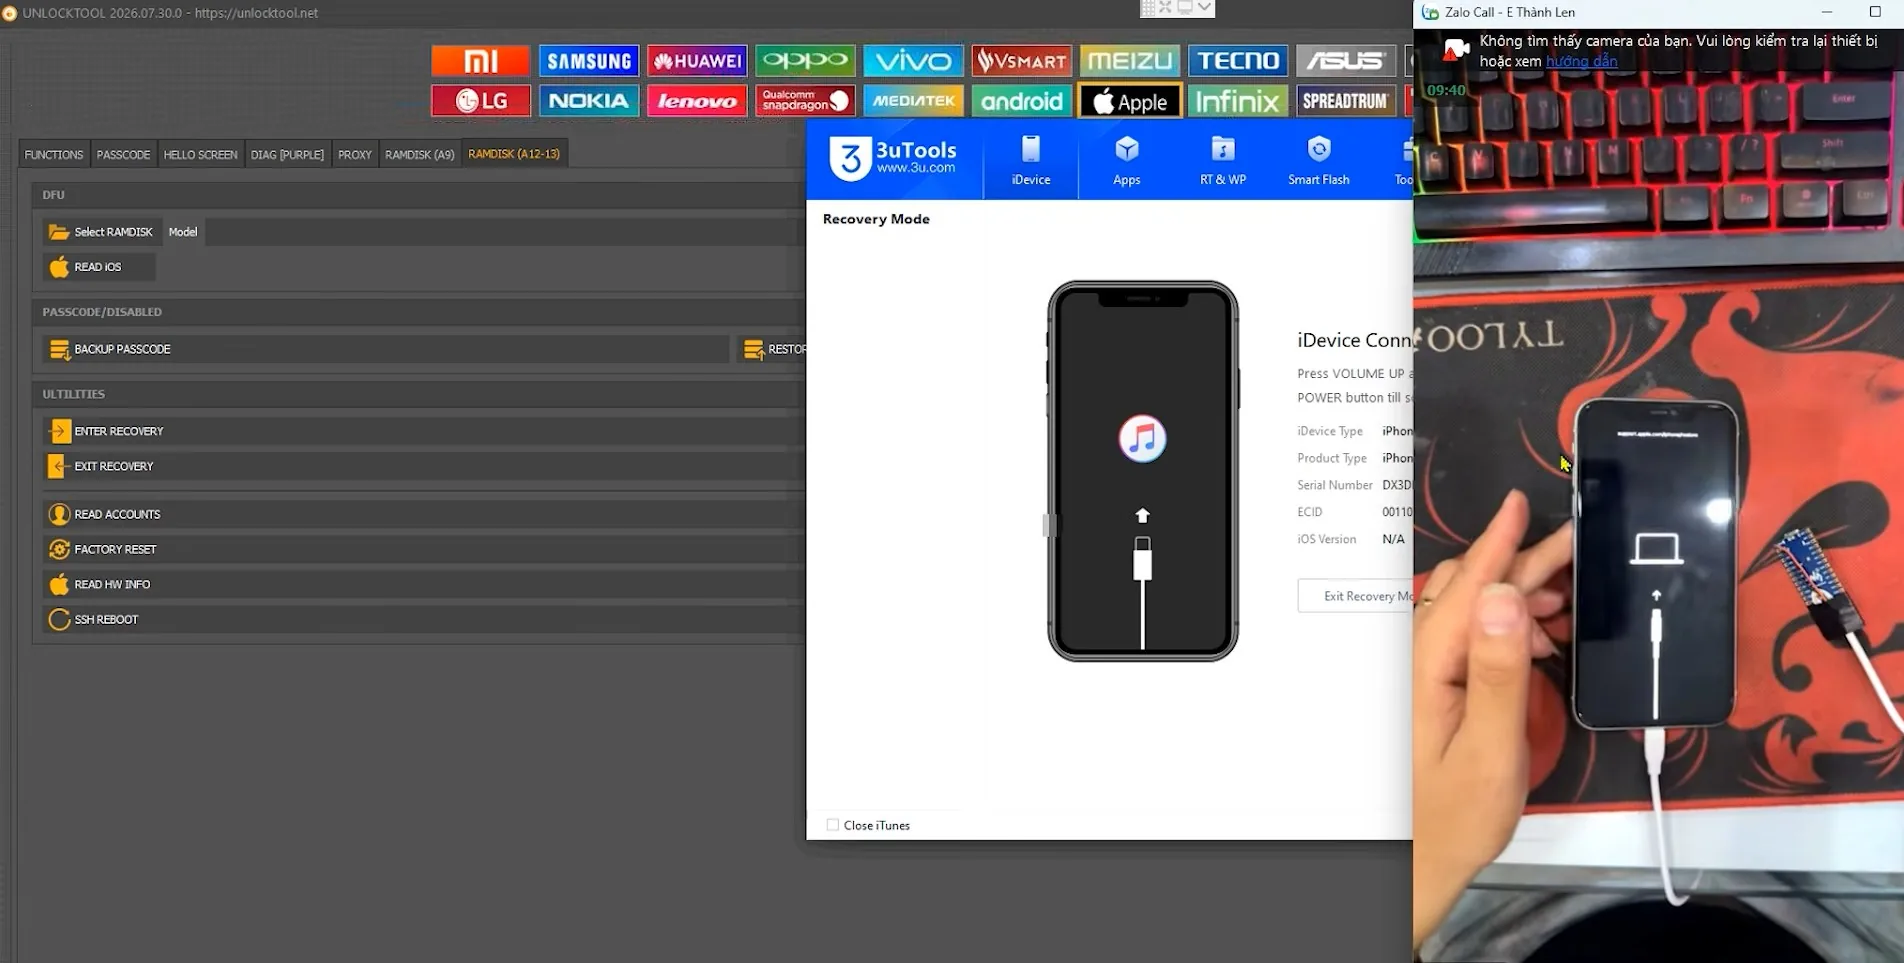
Connect the iPhone to the computer and use the correct button sequence to enter Recovery Mode. Open the relevant Apple module in UnlockTool and read the device information. Record the exact model, iOS version and any identifiers needed for the job.
If the connection repeatedly drops or the tool cannot read the device consistently, stop and check the driver, cable and USB port. A stable connection at this stage is more important than moving quickly to the next step.
Step 2: Download the matching ramdisk and IPSW files
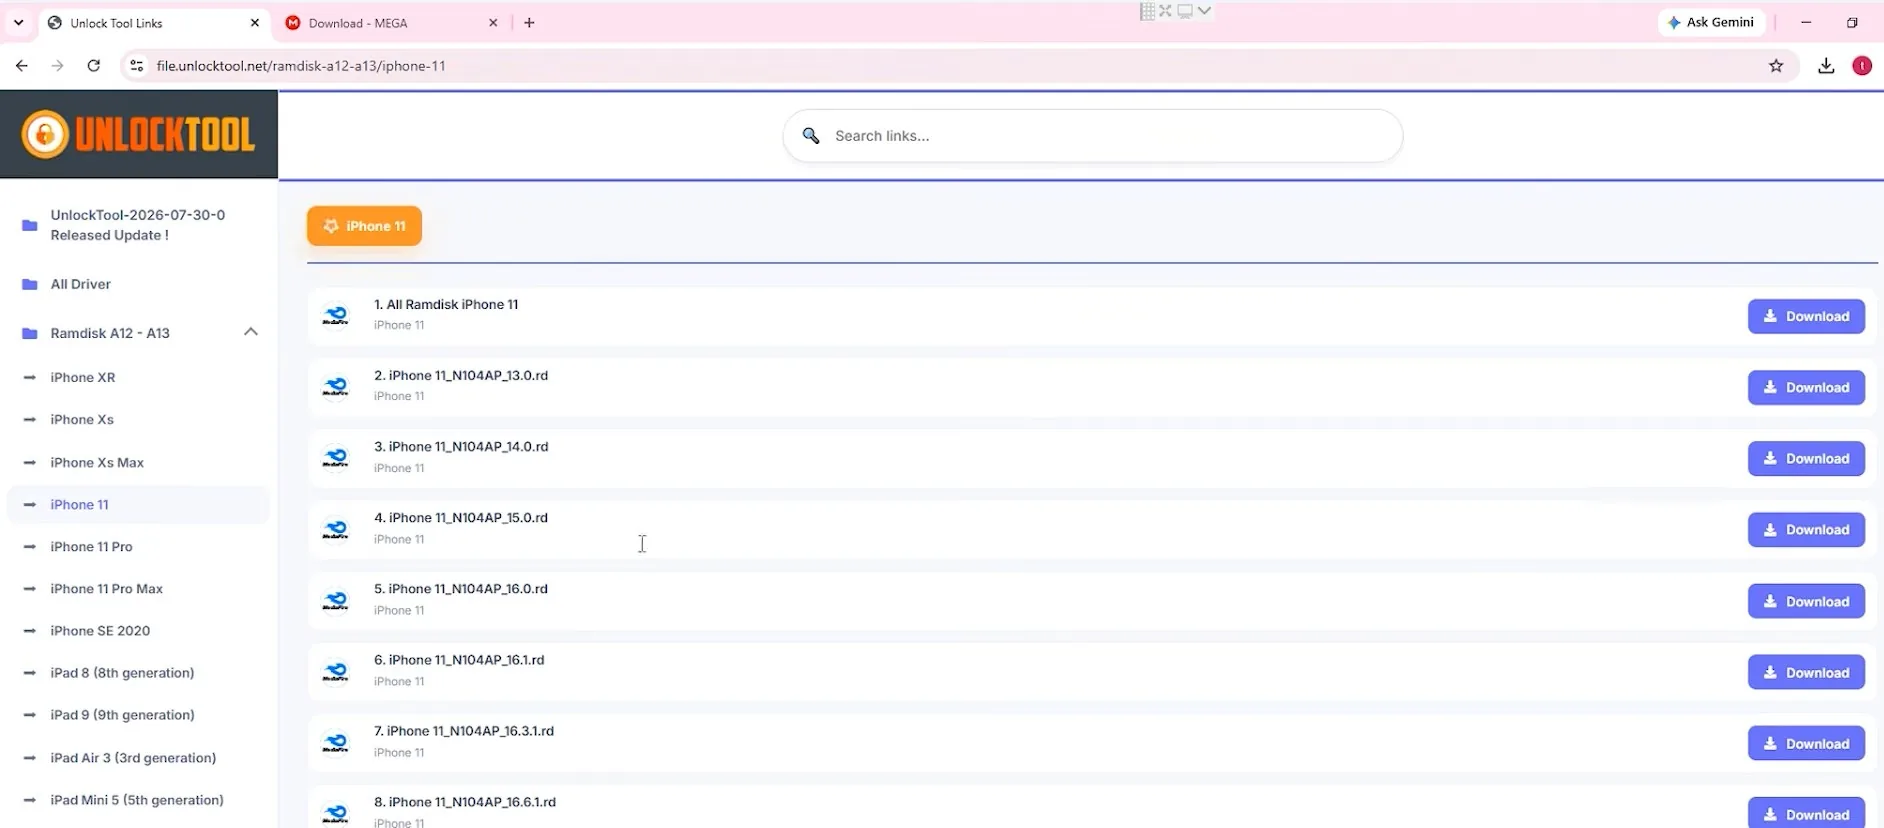
Select files that match the device information you just read. Do not choose a file because its name merely looks similar. An incorrect file can prevent the ramdisk from booting, cause the tool to stop partway through the process or create unnecessary troubleshooting work.
After downloading, verify the file name and size. Check its integrity when the provider publishes a checksum. Store the files in a short path using basic Latin characters to avoid compatibility problems with older Windows applications.
Step 3: Select the files in UnlockTool
Open the applicable Apple or ramdisk section in UnlockTool, select the exact model if required and point the application to the prepared files. Review the on-screen log before continuing. Do not force the operation if the tool reports that the files or software version are incompatible.
Step 4: Enter DFU Mode and prepare the device with RP2350
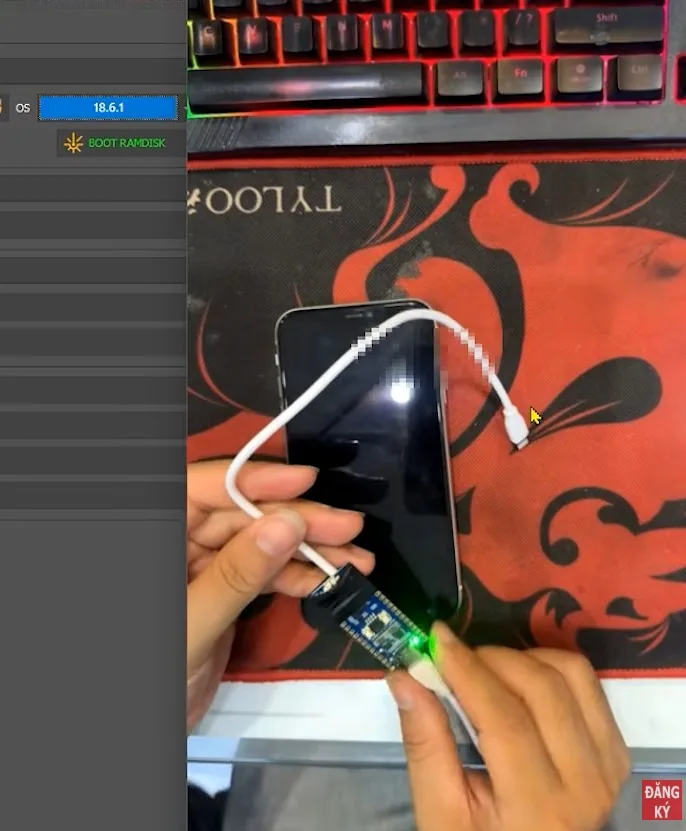
Move the iPhone from Recovery Mode into DFU Mode using the timing required by the model. The iPhone display should remain black while Windows continues to detect a USB device. Complete the RP2350 stage according to the documentation for the board firmware you are using.
Recovery Mode and DFU Mode are different states. If the iPhone displays a cable or computer graphic, it is still in Recovery Mode. Repeat the button sequence instead of continuing from the wrong state.
Step 5: Reconnect the iPhone and confirm its status
After completing the RP2350 stage, connect the iPhone directly to the Windows computer and review the UnlockTool log. Continue to the ramdisk boot only when the application confirms that the device is in the expected state.
If Windows repeatedly plays the USB disconnect and reconnect sounds, replace the cable or use another port before doing anything else. Intermittent USB connectivity can interrupt both the backup and restore stages.
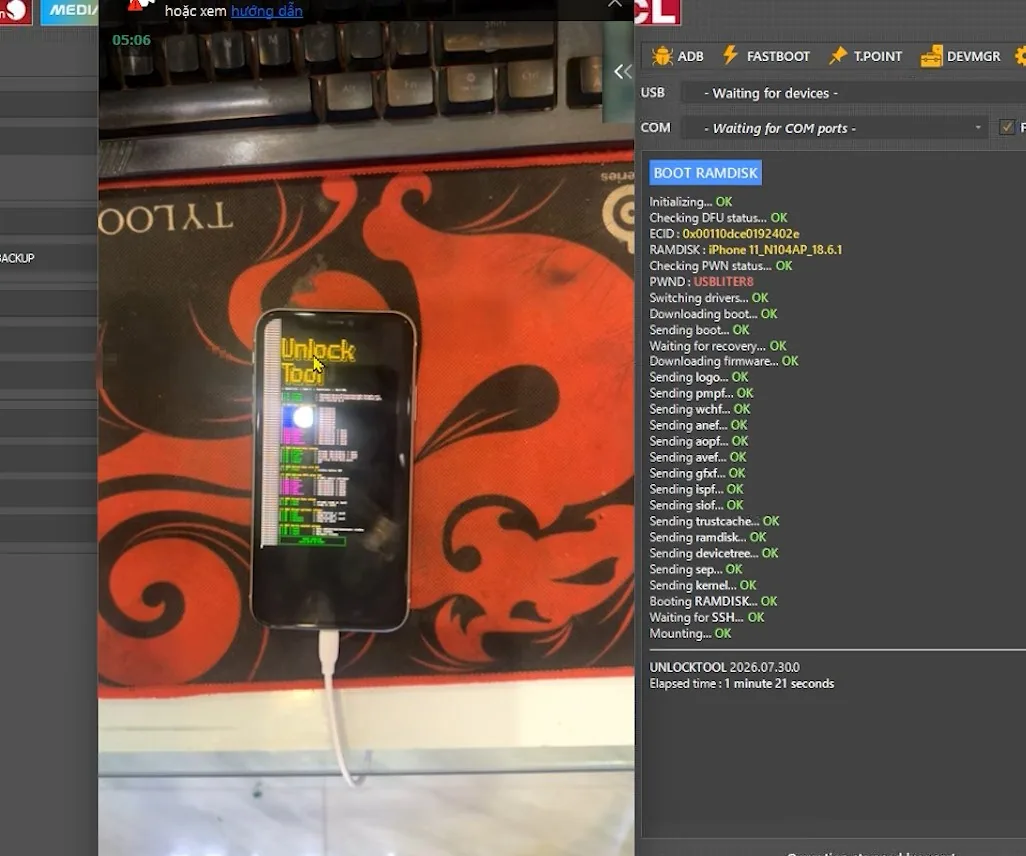
Step 6: Boot the ramdisk and create the passcode backup
Run the ramdisk boot function and wait for the device to finish booting. Use the backup function provided by UnlockTool once the ramdisk environment is ready. Do not disconnect the cable, close the application or allow the computer to enter sleep mode.
When the application reports success, locate the output folder and verify that the backup exists. Keep a protected copy. If the file is missing, has an unexpected size or the log contains errors, do not proceed to the factory reset. A usable device-specific backup is essential for the restore stage.
Step 7: Factory-reset the iPhone
Start the factory reset only after confirming that the backup was created successfully. This stage erases the current data and screen passcode. Keep the connection stable, wait for UnlockTool to finish and do not force a restart while an operation is still running.
Step 8: Boot the ramdisk again and restore the backup
The state used for the first ramdisk session will normally be lost after the reset. Put the iPhone into DFU Mode again, repeat the required RP2350 stage, reconnect it to the computer and boot the ramdisk for a second time.
Select the backup created for this specific device and run the restore function. When the tool reports completion, restart the iPhone and inspect the setup and activation state. Test Wi-Fi, cellular service, Bluetooth, cameras and other basic functions. Save the job log in case the device needs further diagnosis.
Common errors and troubleshooting checks
UnlockTool cannot detect the iPhone in Recovery or DFU Mode
Check the Apple Mobile Device driver in Windows Device Manager, try another USB port and test a different data cable. Close iTunes or other Apple device software if it is holding the connection. Restart Windows after reinstalling the driver when necessary.
The iPhone will not enter DFU Mode
Repeat the model-specific button sequence and pay close attention to timing. A device in DFU Mode normally has a completely black screen while the computer still detects it. An Apple logo or Recovery graphic means the sequence was not completed correctly.
The ramdisk boot stops before completion
Recheck the selected ramdisk, IPSW, application version and device state. Avoid virtual machines and unreliable USB hubs. Read the final error lines in the log before retrying instead of repeating the full process without changing the probable cause.
The backup is missing after a success message
Check UnlockTool's default output folder, the application's permission to write files and any Windows security software that may have quarantined the output. Do not perform a factory reset until you have located and validated the correct backup.
The device does not behave as expected after restore
Review the restore log, confirm that the backup belongs to the device and check its activation state. Do not repeat the operation several times without identifying the cause. If Activation Lock is present or ownership is unclear, stop and work with the owner or an official Apple support channel.
Post-service checklist
- The iPhone starts normally and does not remain in a boot loop.
- The setup and activation state matches the expected result.
- Wi-Fi, Bluetooth, cellular signal and mobile data work correctly.
- The cameras, speaker, microphone, touchscreen and charging are tested.
- The job log, model information and backup are stored in the correct case record.
- Customer data is deleted when it is no longer required for the authorized repair.
Should you rent UnlockTool by the hour for this job?
An hourly rental can be practical when you are servicing only a few devices, have already downloaded the required files and are comfortable working with Recovery Mode, DFU Mode and ramdisk tools. Choose a package with extra time if you still need to diagnose a complex device or learn part of the workflow.
Before ordering, identify the exact model and iOS build, install the drivers, prepare the RP2350 board, download the required files and verify current UnlockTool support. MobiUnlock supplies access to an account for the selected rental period. The outcome still depends on device compatibility, software support and the technician's work.
View the available UnlockTool rental packages at MobiUnlock after completing the compatibility and preparation checks.
Frequently asked questions
Is a passcode bypass the same as removing iCloud Activation Lock?
No. The passcode protects the device screen, while Activation Lock is connected to Find My and the owner's Apple Account. This workflow is not an Activation Lock removal guide.
Does this procedure work on every A12 and A13 iPhone?
No. Support varies by model, iOS build, security state, device condition and UnlockTool release. Read the device information and check current support before starting.
Why is the ramdisk boot performed twice?
The first session is used to create the backup before the device is erased. After the factory reset, the iPhone must be prepared again so the ramdisk can boot and restore the saved data.
Is an RP2350 board always required?
That depends on the model, workflow and tool version. If the current support instructions require RP2350, use a compatible board and the correct firmware. Do not substitute unverified hardware or firmware.
What should be ready before the rental time starts?
Install UnlockTool and the Apple drivers, test the cable, prepare the RP2350 board, download the required ramdisk and IPSW, verify device support and create a dedicated backup folder. Sign in to the rented account only when the workstation is ready.
Should I factory-reset the device if the backup fails?
No. Stop the procedure and inspect the log, output file and cause of the failure. Resetting without a valid backup may leave you without the data required for the restore stage.